|
In Part 1 of our series on coloring Spectickles cartoons, we talked about the basic formatting and ended up with a completed black and white Spectickles cartoon. That's necessary before we move on to the next section - this section, where we discuss what layers are and how we use them in applying color to our cartoons. First, what is a layer? The way I think about them is they're like a clear piece of plastic that you're going to lay on top of our black and white cartoon. What we do on that clear piece of plastic won't effect the black and white cartoon beneath it, which is something, as you'll see, we'd prefer. And fortunately, with the Clip Studio Paint Pro program, as with most other drawing programs, we can turn the layer on and off for our purposes. So, rather than keep explaining in words only, let's take a look at our screen and talk a bit more about where to find layers and how to set them up. 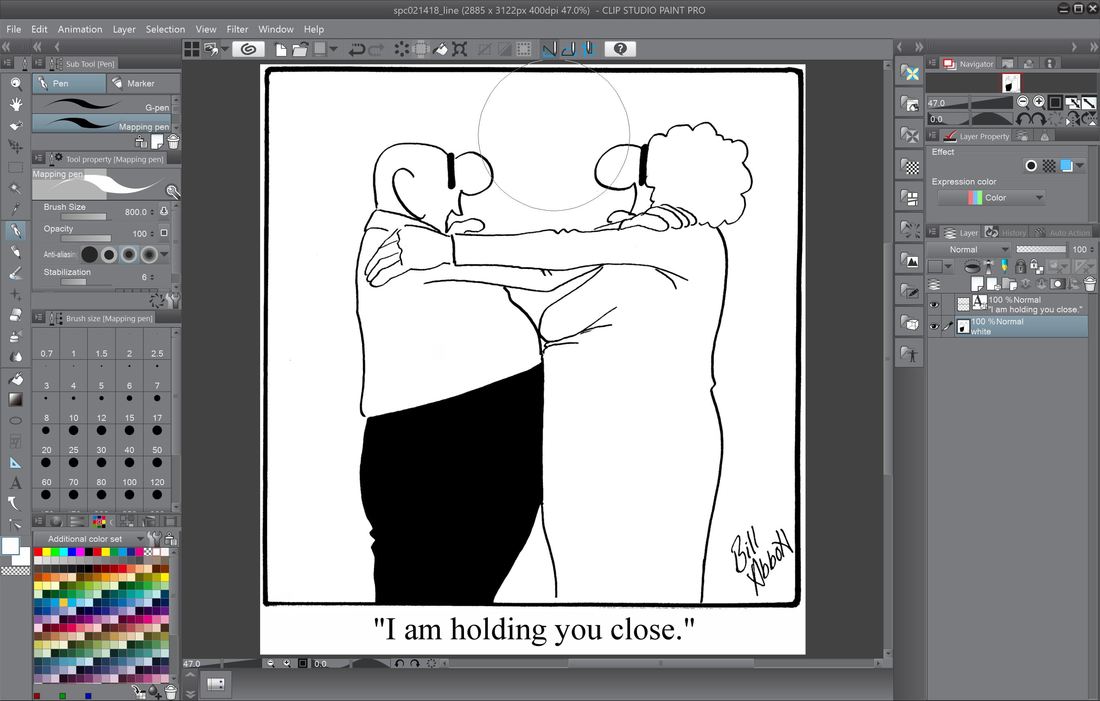 Here's where we left off in part one, with a completed, formatted black and white Spectickles cartoon. 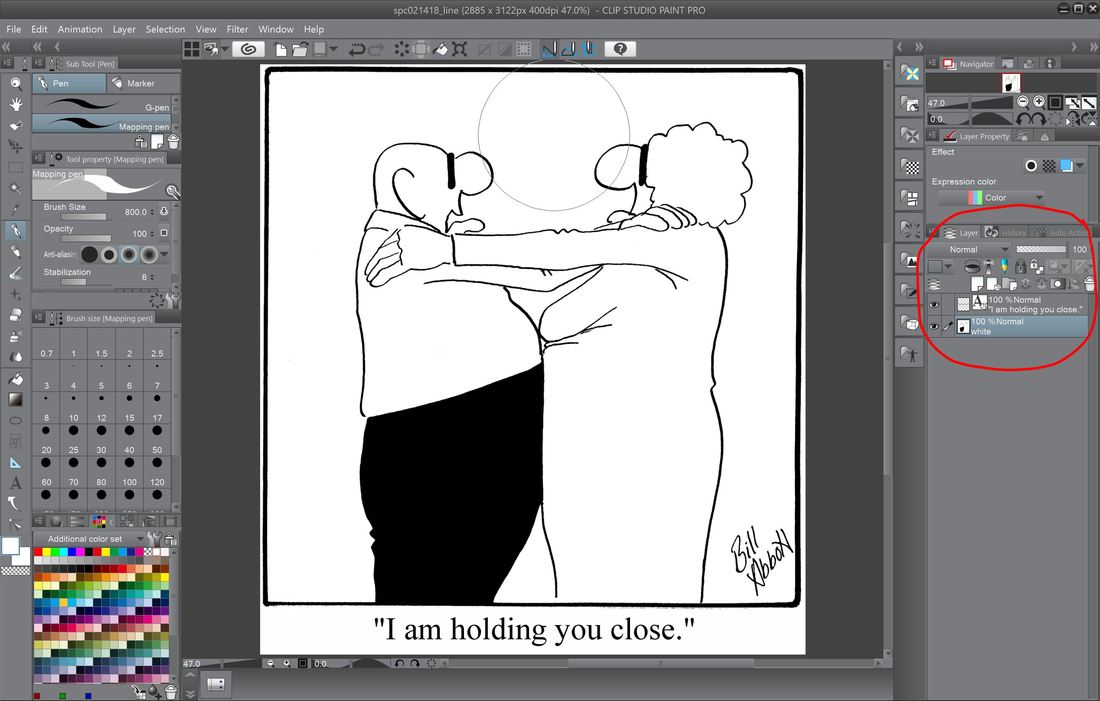 When it comes to our first steps in adding color to a Spectickles cartoons, we need to turn our attention about mid-way down on the right side of our Clip Studio Paint Pro screen, where we'll have a look at the 'layers' section. 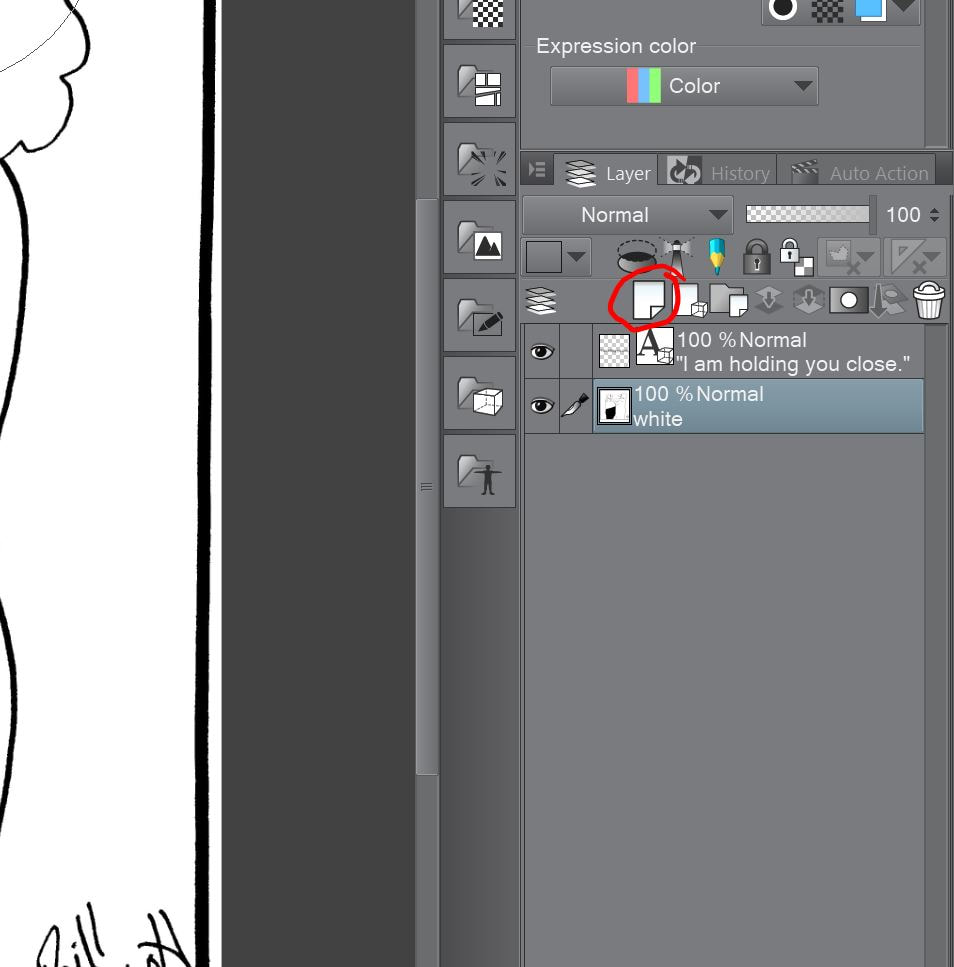 When we left off last time, we had 2 layers - our bottom layer which contains the black and white cartoon, and laid on top of that is our text layer. And remember too, whichever layer is highlighted in that blue/green color is the active layer, or the layer that'll be affected by anything you do in the image. In the area I've circled in red - that's where we click to add another layer, which we'll do now for our color. 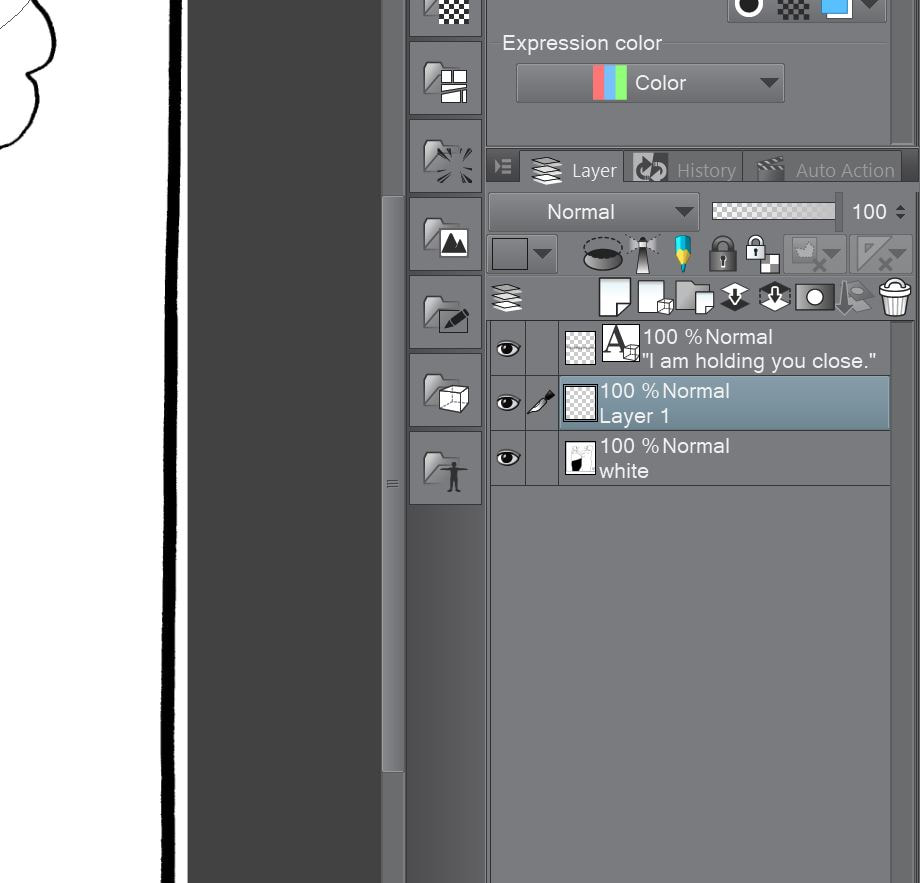 As you see highlighted, the active layer is the one we've just added, which is sandwiched between our black and white layer (which for whatever reason is just labeled as 'white' - we'll change that) and the text layer on top. 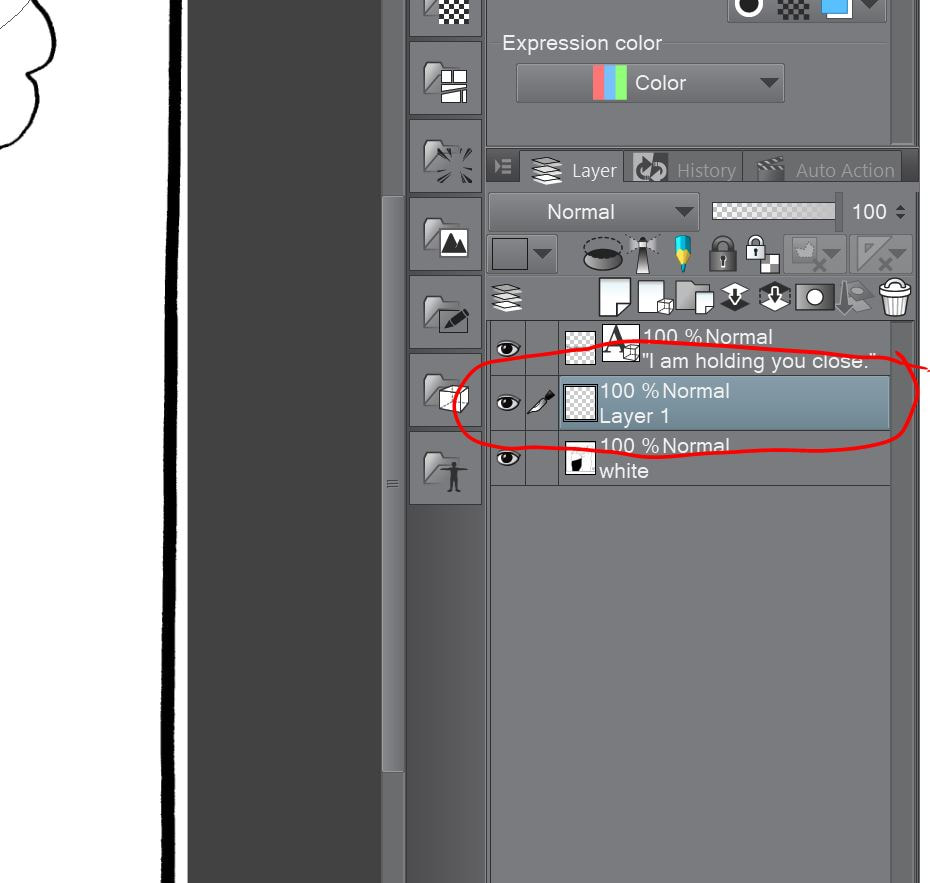 As we work with our layers, we'll want to keep them straight - we want to know at a glance which one we're working on, so it's useful to label them accordingly. In order to change the name of the layer, just double-click over where you see 'Layer 1'. 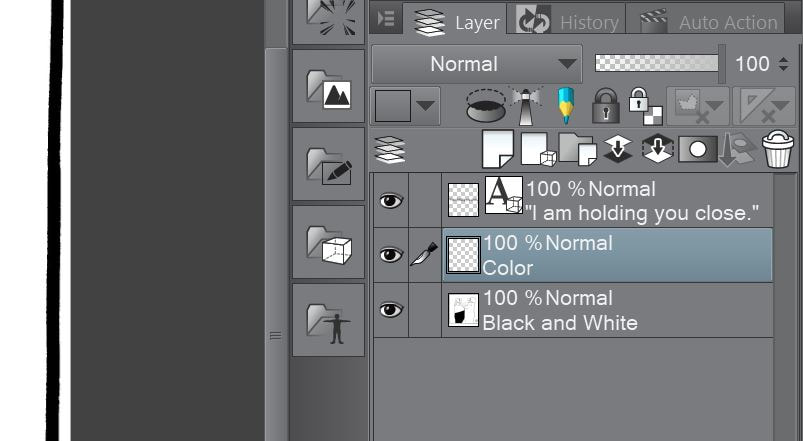 When you double click on the layer, the box will open and allow you to relabel. In this case, I've changed the color layer to, oddly enough, color, and the black and white layer to - you guessed it, black and white. Next, you'll notice just above where we relabeled our layer to 'color', it says 100% Normal - we'll need to change that to 'Multiply' so the layer interacts differently with the other layers - you'll see why in the next screen. 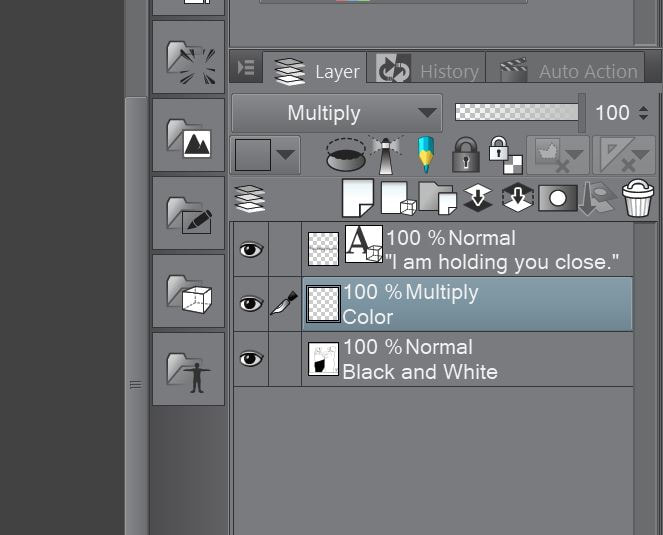 In the screen above, you can see I've changed the layer to 'Multiply' from 'Normal'. Do you see where the little lighthouse-looking thingy is next to the blue and yellow pencil icon? Just above that is a dropdown box which now says 'Multiply'. Prior to clicking on the dropdown and making the change it said, 'Normal'. So as I'm sure you've guessed already, click on that box and make the change. The reason we want the layer to 'Multiply' is that when we color, if it's on the 'Normal' setting, it'll color over the layer beneath it, so it looks like your obliterating the underlying black and white. By making the layer, 'Multiply', it'll interact with the layer beneath, so you'll still see your line work as you color.  Now that our layers are all set up, we're ready to have a look again at the left side of the Clip Studio Paint Pro work surface and tools. 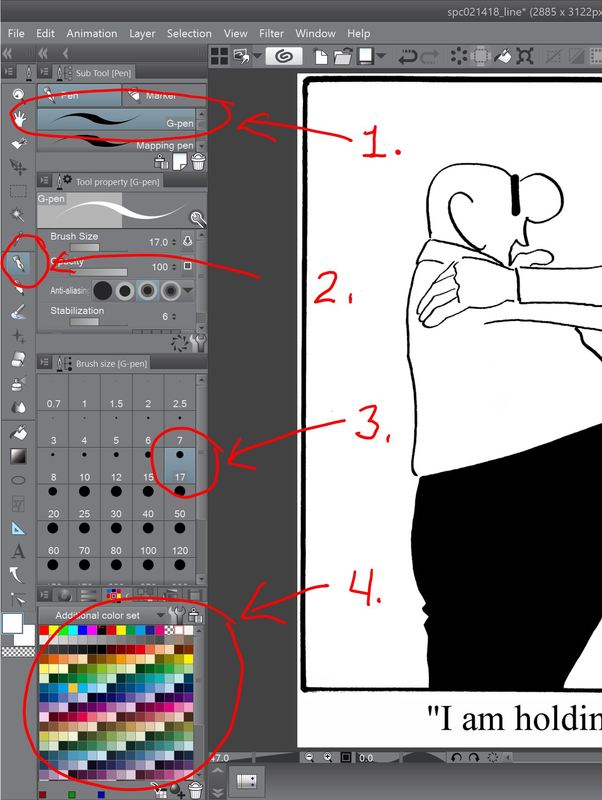 The first bit of coloring I do is laying down all the flat colors - the shading comes later. On the left of the screen, I select the pen tool, which is circled in red and labeled 2. Once that's selected, above that labeled 1. is the type of pen, and in this case, my preference in the gel pen - I just like the type of line it produces - pretty much as simple as that. 3. is the width of the pen tip in pixels. If I were drawing lines, I typically use 17, where it's set now. But to begin coloring, I start with the background and make the pen tip really wide - usually over 800 pixels since at this stage, precision isn't required. And of course, below that is our color pallet to choose from. 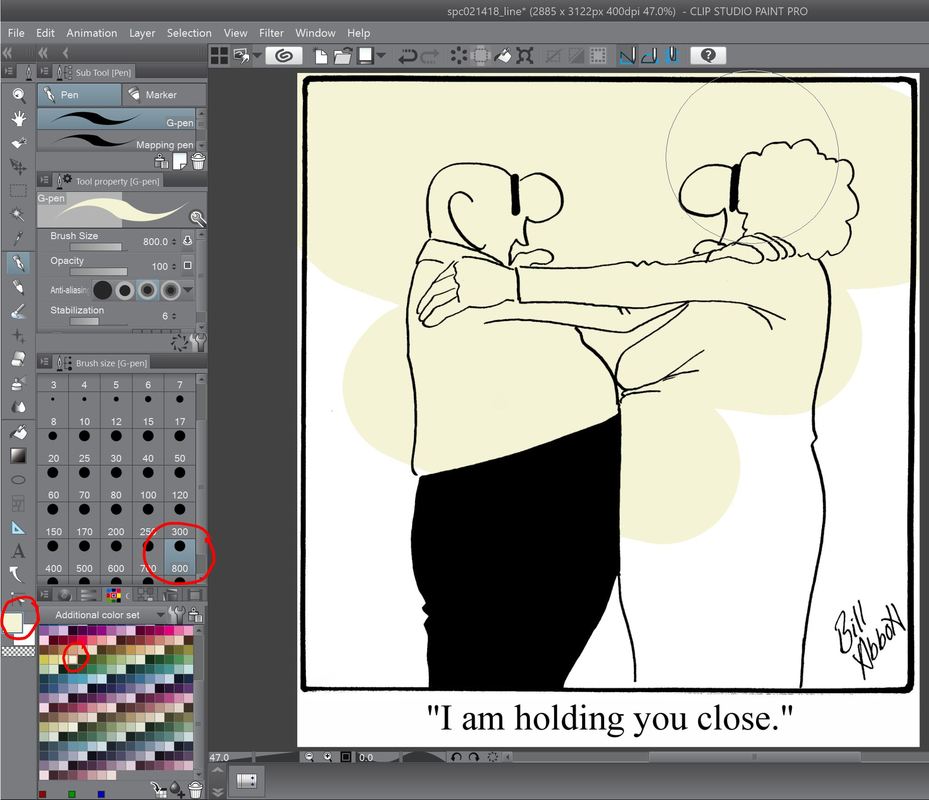 Because I want your eye to be drawn to the characters, the background color is usually pretty muted. As you can see where I circled on the left, I'm adding the color with the pen tip cranked up to 800 pixels and the color I chose is pretty bland. 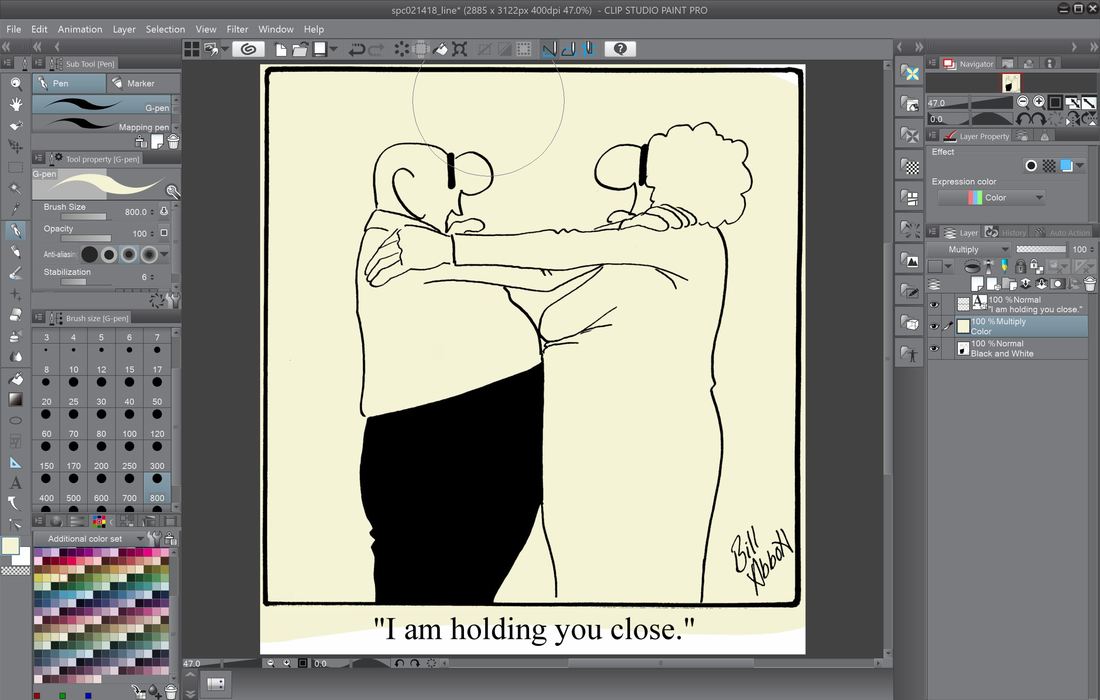 When I color the background, I'm not at all concerned with neatness - just get it done and I'll clean up all the white trim areas later. 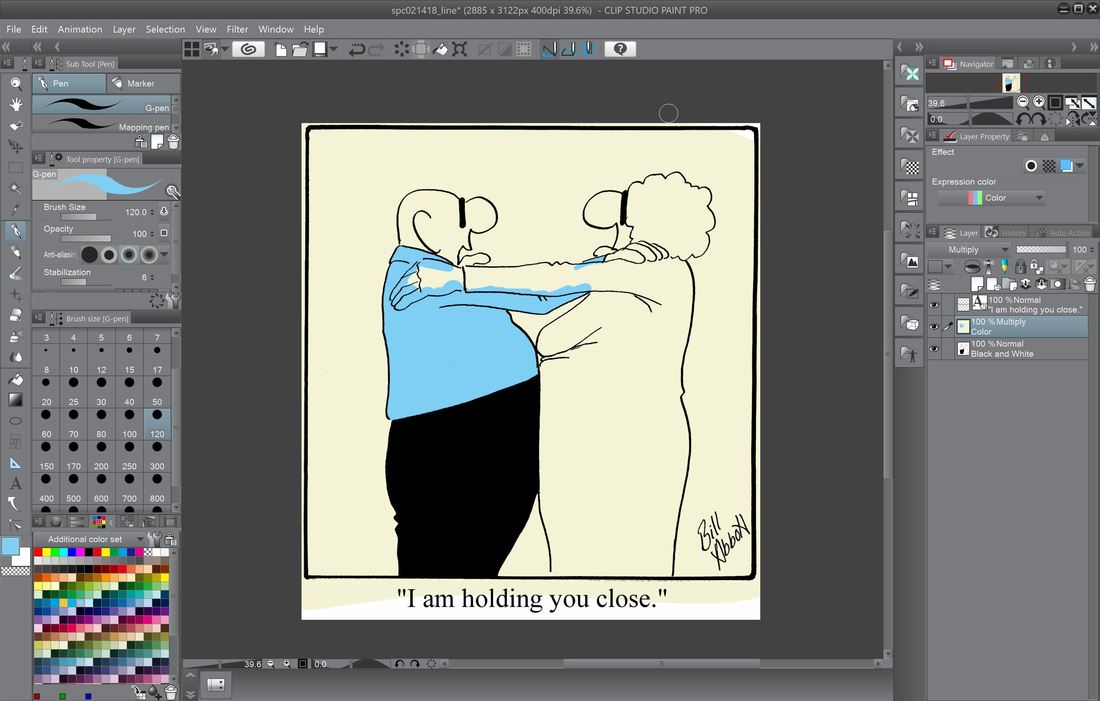 Next, I start adding color to the characters. Because this husband and wife team are the center of Spectickles, the colors I use, for the most part, should be the same to help make them instantly recognizable - the husband's shirt is always the same blue, and the wife's dress is always the same pink. 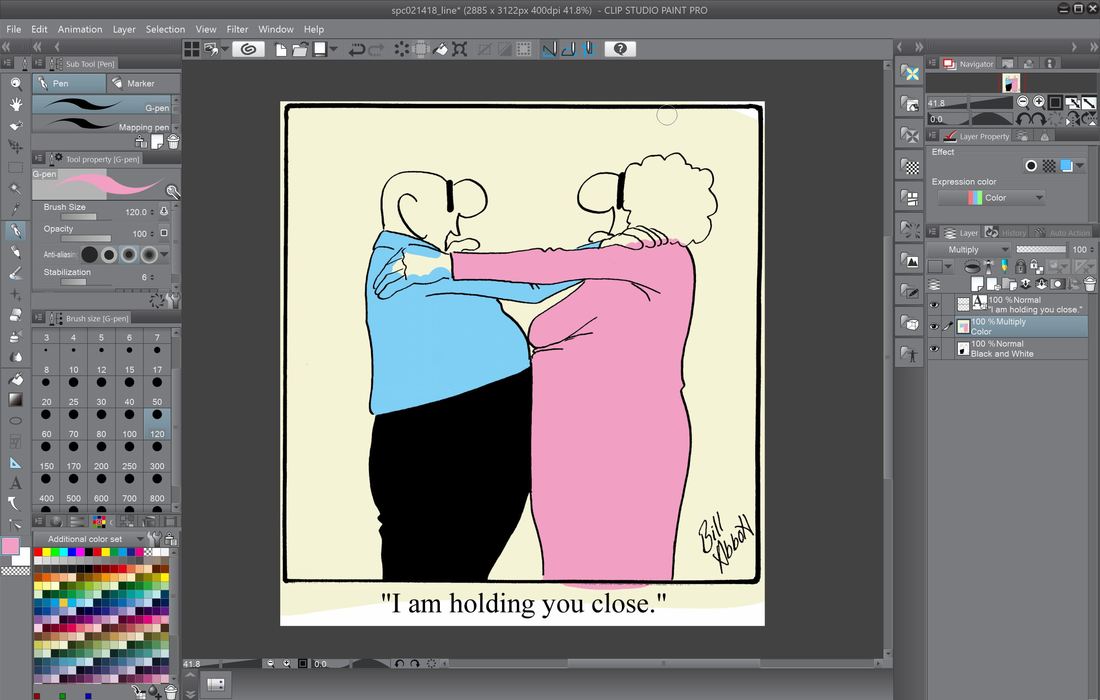 When it comes to coloring the characters, I need to be precise in the areas that terminate at another color - coloring within the lines, except in places where it doesn't matter, as you see at the bottom of the cartoon. 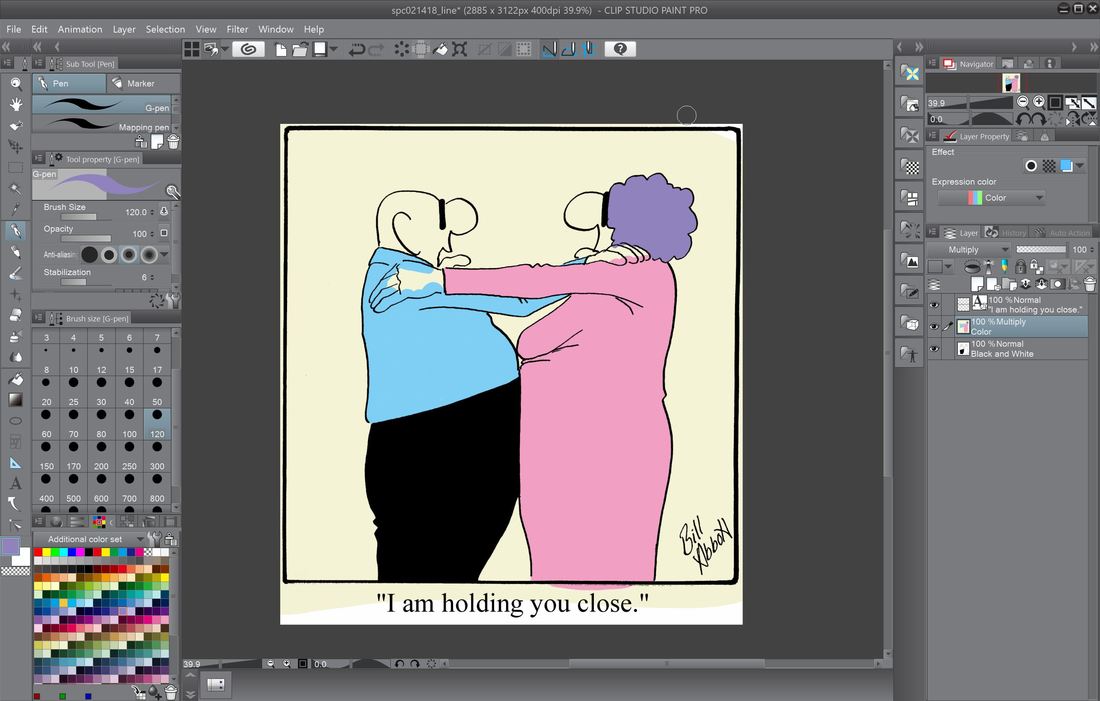 More color applied - in this case the wife's hair. See Ma - I'm staying within the lines! 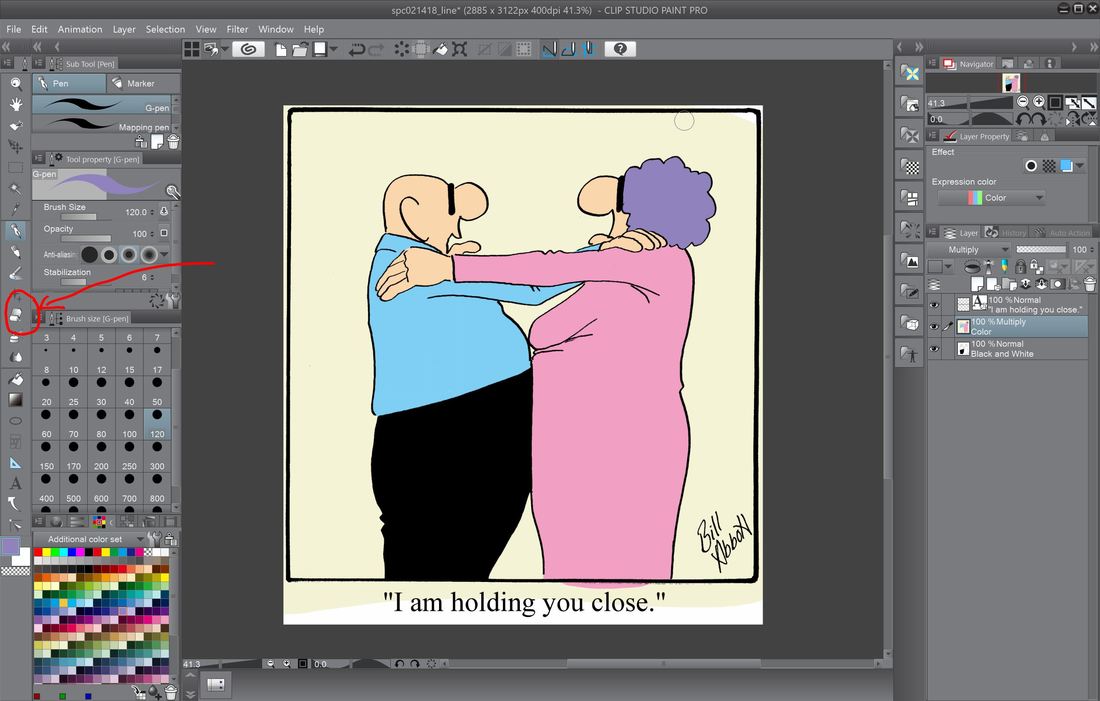 Now that all the flat colors are applied, it's time to clean up around the edges. You can see encircled in red is the eraser tool. That can also be enlarged as needed - you can see here it's currently at 120 pixels. 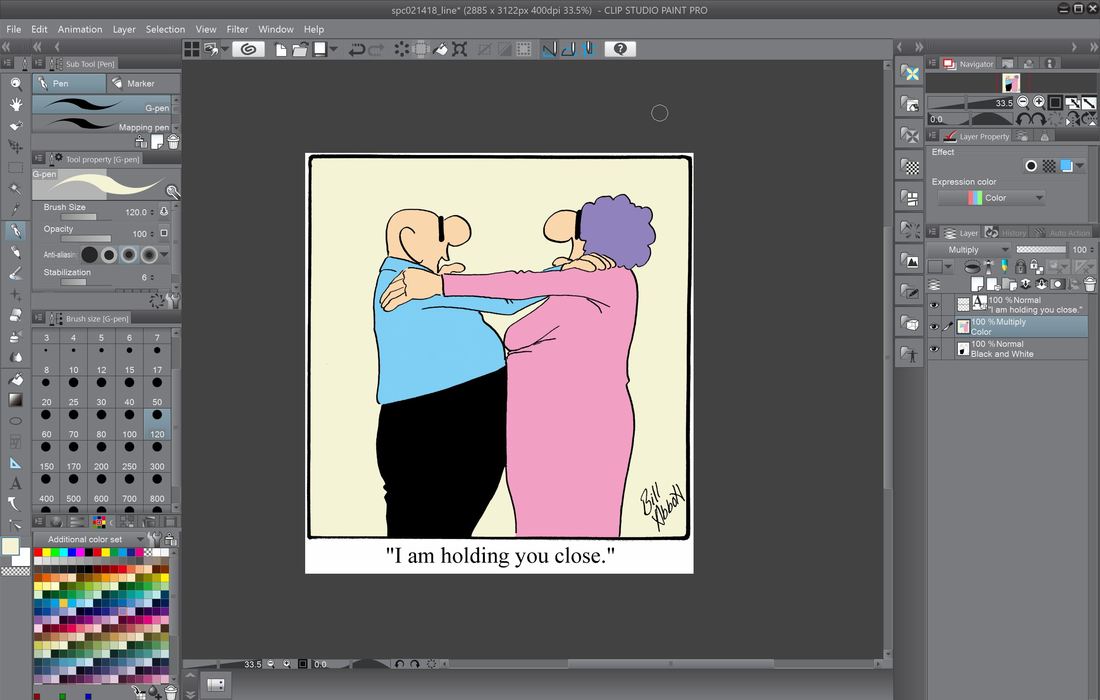 Here the flat colors and cleanup are all done, and we're ready to start some shading. 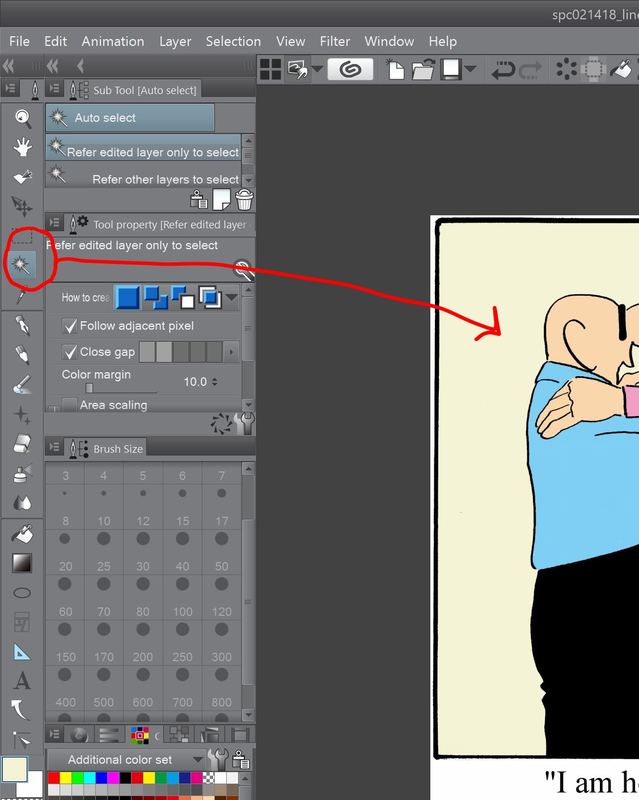 One of the really great tools available in Clip Studio Paint Pro, and other programs for that matter, is the 'Magic Wand' tool. When I'm going to apply shading, I'll click on the tool, which is circled in red above, then hover over the area I intend to color, then left click on it. When you do that, the Magic Wand will select that area of contiguous color - you'll see a pulsing dotted line around the area when it's selected, and whatever actions you take will only effect that area. So for shading, I make sure I've got the right color selected that I wish to use for shading, then move down to the next tool we'll talk about, the 'Airbrush' tool. 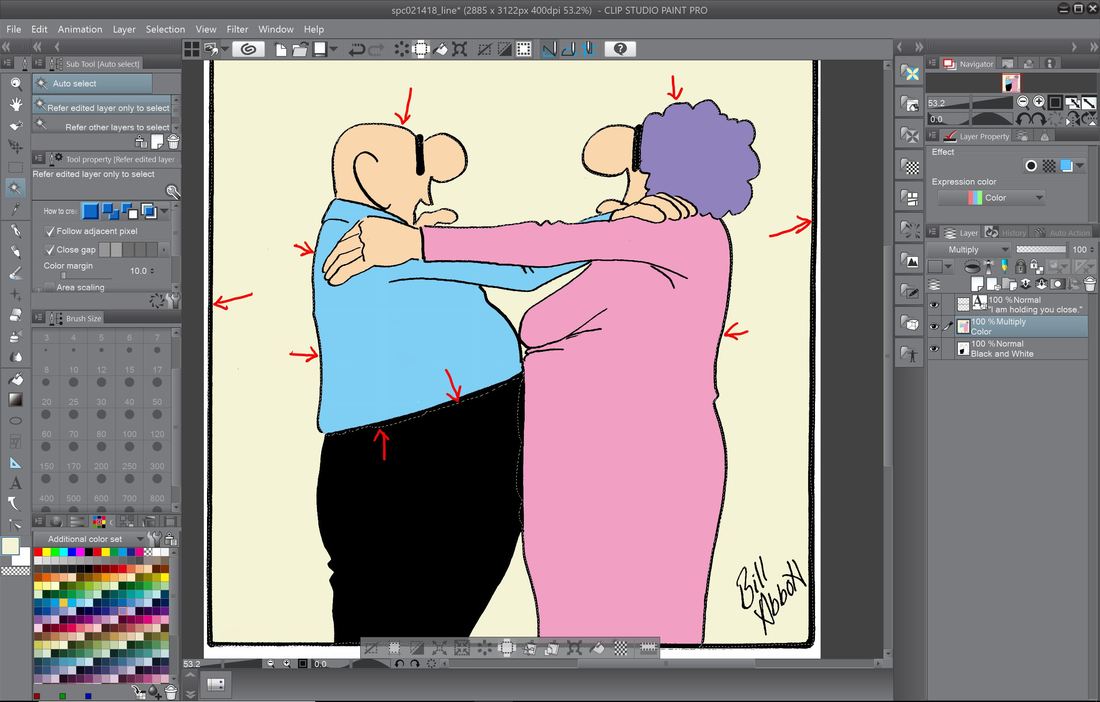 Above you can (hopefully) the active dotted line that surrounds the area of contiguous color selected by the 'Magic Wand' tool. 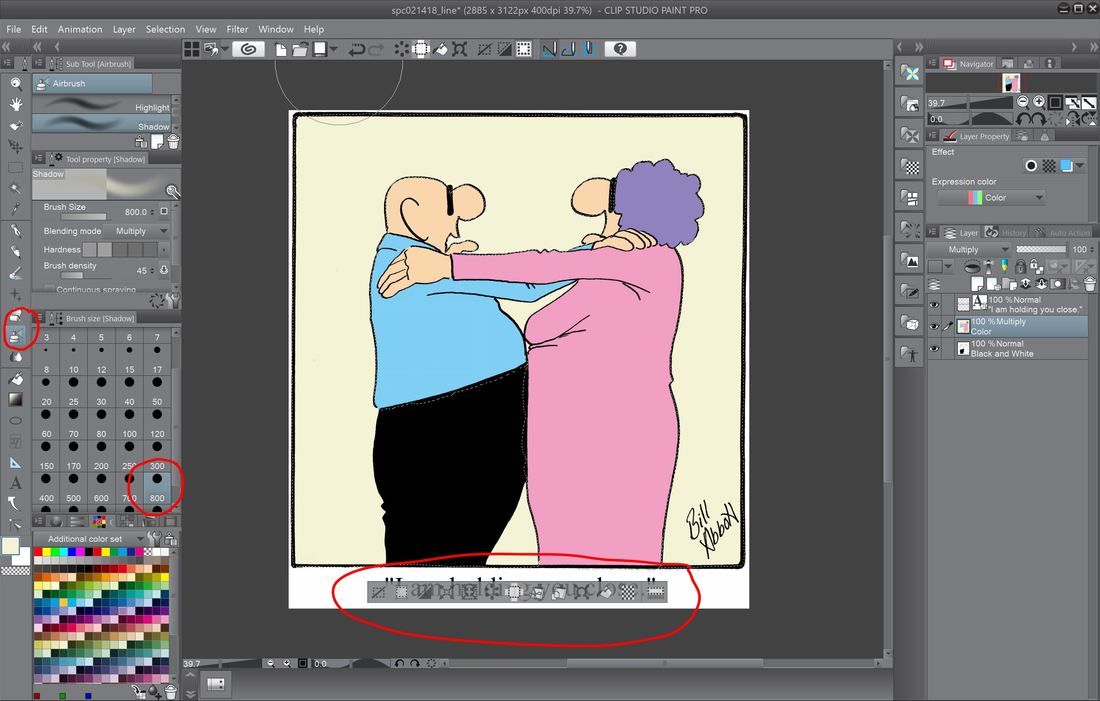 Also, when the are you've selected with the 'Magic Wand' is active, an elongated box with show up beneath the area you've selected with a group of additional tools for manipulating the image. But since they go beyond the scope of our current topic, we'll save those for another time. On the left of the screen you can see a tool that I've circled that looks like the top of a can of spray paint - that's the 'Airbrush' tool we'll use. Below that is the spray area - just like with the pen and eraser, measured in pixels. 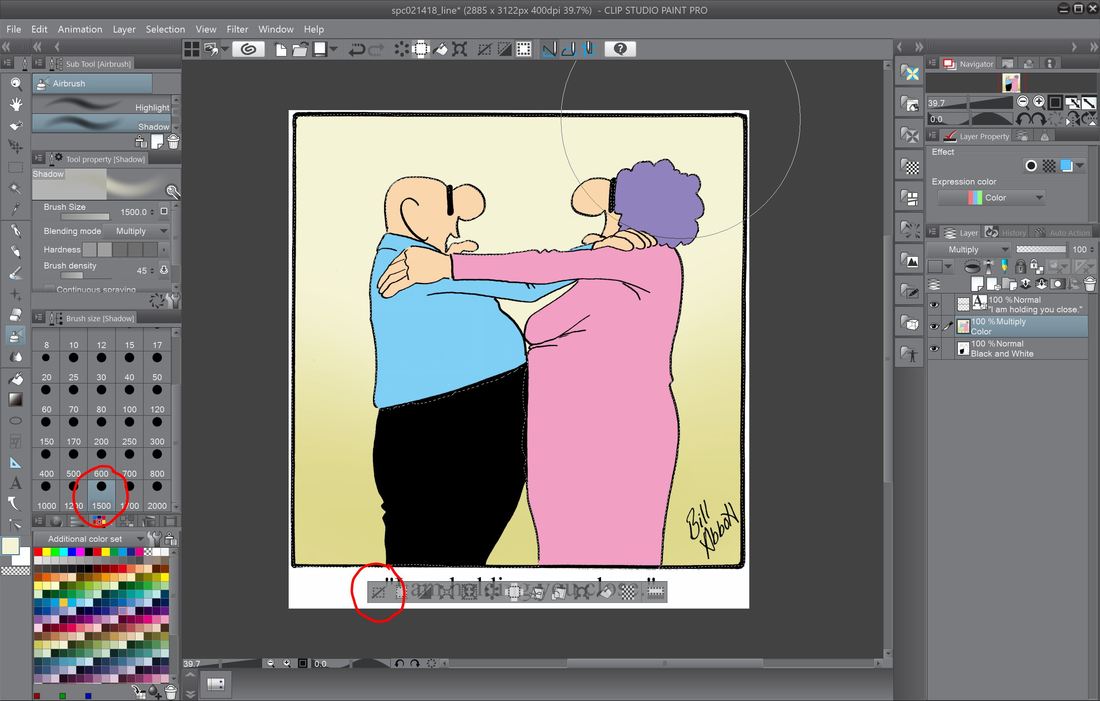 When you want to deselect the area used with the 'Magic Wand' tool just click on the left-most icon within the elongated box, circled above. 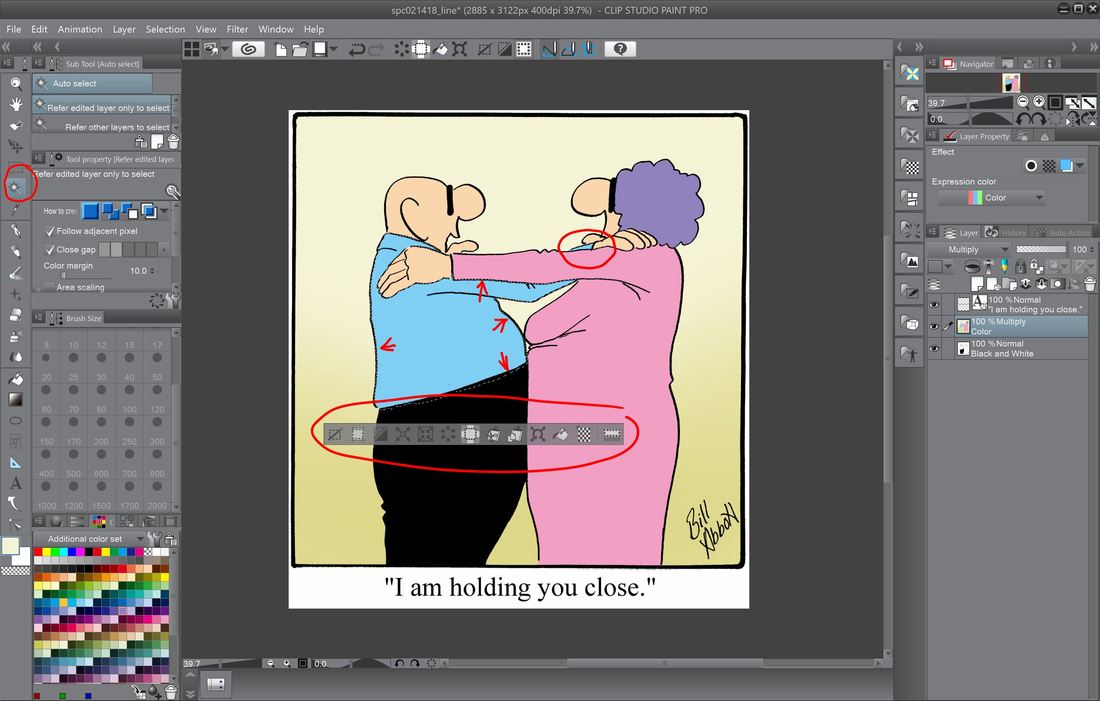 When you use the 'Magic Wand' tool, it will only choose the section of color that is contiguous. If it is separated by another color, it will remain unselected, as circled above. 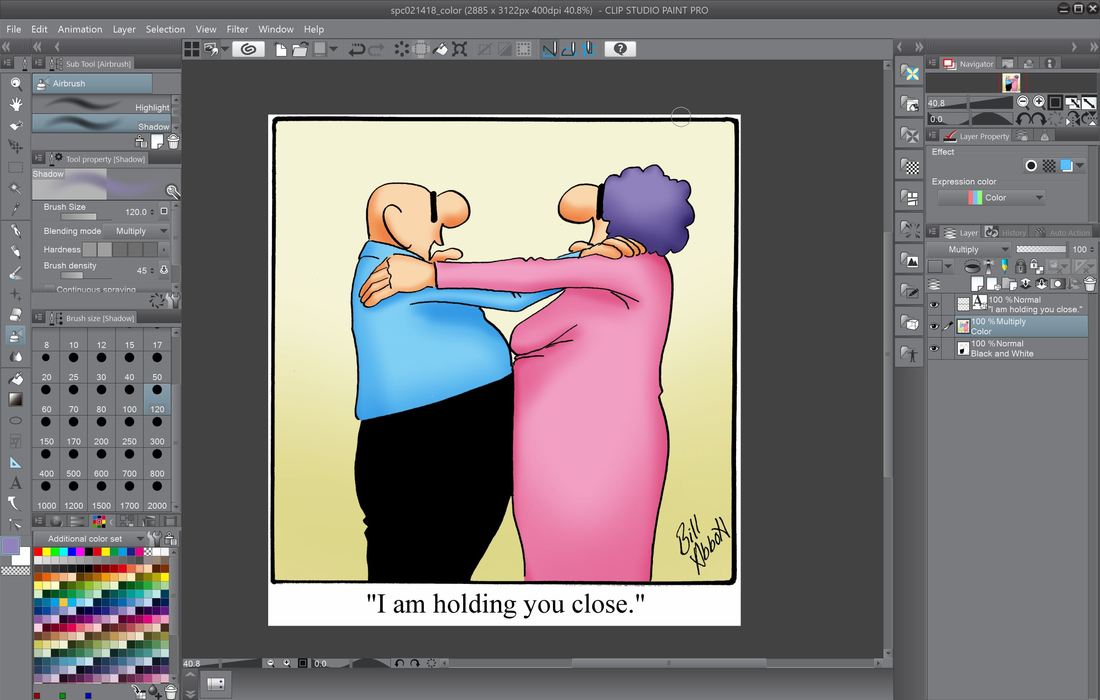 The final results of using the combination of 'Magic Wand' tool and the 'Airbrush' tool to add a shading effect to the now complete cartoon. 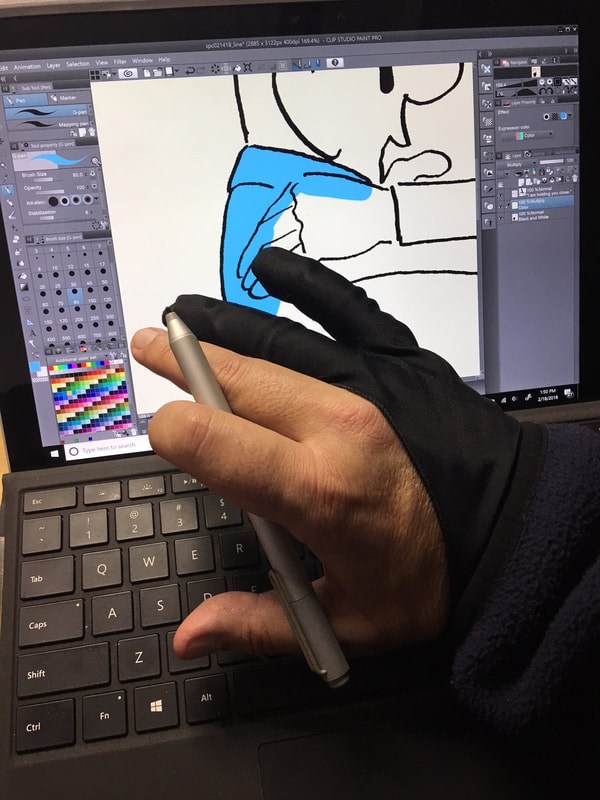 No, this isn't a poorly chosen fashion statement - it's a half-glove I use to prevent the palm of my drawing hand from interacting with the screen as I draw and color. The software is actually really good in preventing it from happening, but I don't have time to discover too late that it didn't work.  Coloring on the Surface Pro 5.  The completed cartoon. Thank you again for spending time here. Up next, the step-by-step process I use in creating the now all digital Percenters cartoons.
8 Comments
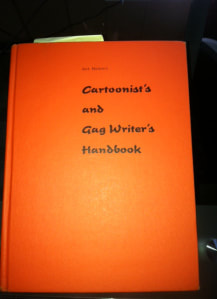
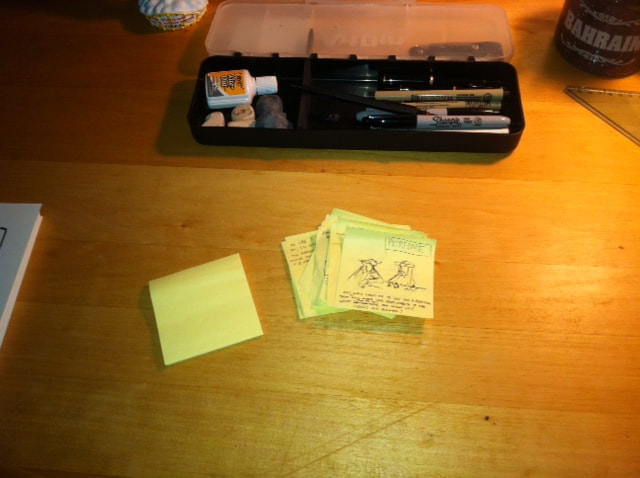
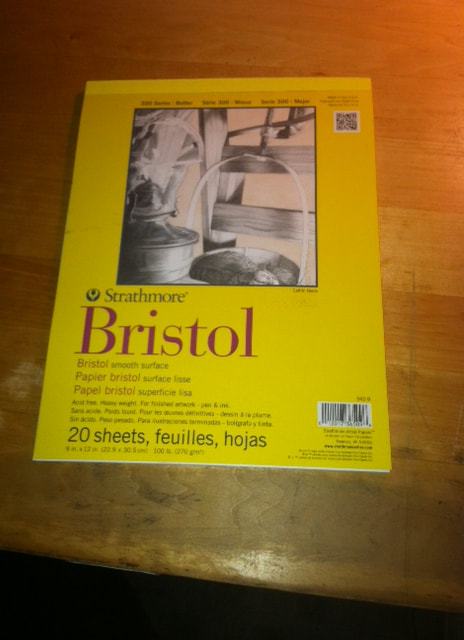
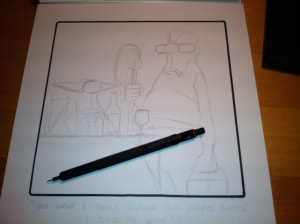
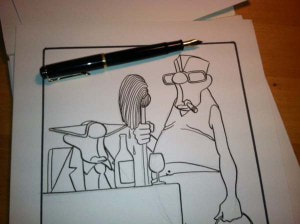
I've been asked a number of times on social media about how I color my cartoons. In my last article, "Creating a Spectickles Cartoon From Start To Finish", I described how I drew the physical, or analog version of the cartoon using old fashioned Bristol board and a fountain pen. In this multi-part article, I'll describe in detail how I color my Spectickles cartoons, starting with the foundational formatting required. First, a few notes regarding the equipment and software that I use for coloring. As mentioned above, the cartoon itself starts traditionally with pen and ink. Once the initial artwork is completed, I scan it into my computer with an older Epson Artisan 710 multi-function copier/scanner/printer. The settings for scanning are black and white at 400 dpi. The computer I use for my artwork is a Surface Pro 5, replacing my Surface Pro 4 which fell out of the backseat of my truck without any protective case. I chose poorly. My Surface Pro 5 is now encased in an Otter Box case, which, to my understanding will replace my Surface Pro if it breaks while the Otter Box is in use. I hope I don't find out. The software I use is the Clip Studio Paint Pro program from Smith Micro. It's a fantastic program for cartoonists and artists, and at a one-time cost of around $50, it's far cheaper than the Adobe Creative Suite and Photoshop, and, in my opinion, better and more intuitive for our uses. On a side note, there's a free program called Krita that I'll be writing about in the future that's stacking up very well with the other professional art program, and again, it's absolutely free. As a career military man, I've found it useful in instruction to explain things in as great a detail as possible, so that anyone could pick up a set of instructions and put into action its contents immediately. That's what I've tried to do here, so even if you have no experience with coloring digitally, these descriptions will guide you through and answer questions before they're asked. For those who are experienced and skilled in digital art, you'll almost certainly know better and more efficient ways to produce these results, and I hope you'll share that with me and our readers in the comments section below. 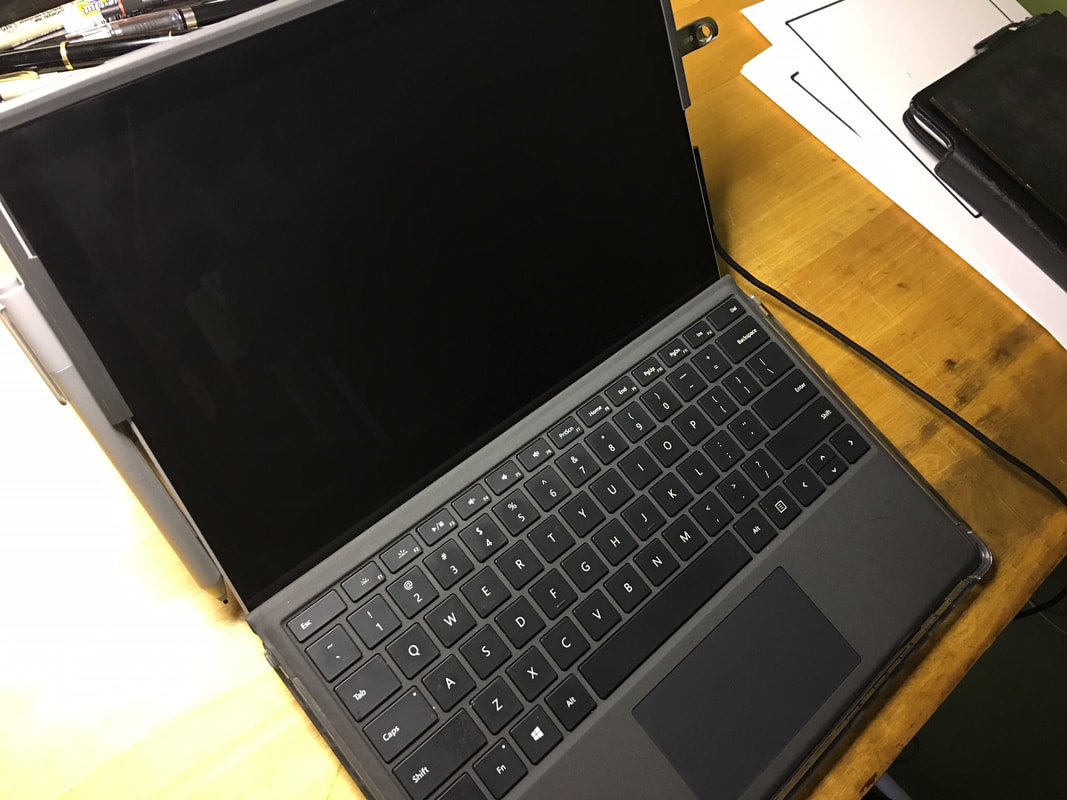 The Surface Pro 5 tablet/computer that is the digital workhouse for my cartooning. I draw and color directly on the screen with the digital pen you see magnetically attached to the side of the Surface Pro. 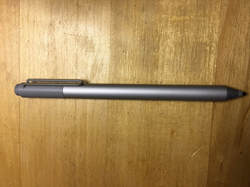 The digital pen that's part of the Surface Pro creative system. At the time I purchased the Surface Pro 4, the tablet came with the pen included. For some unfortunate reason, when I purchased the Surface Pro 5, the pen was a separate cost of $99. Hopefully, they'll abandon that pricing model and go back to including it with the tablet, as part of the tablet's normal functional system. 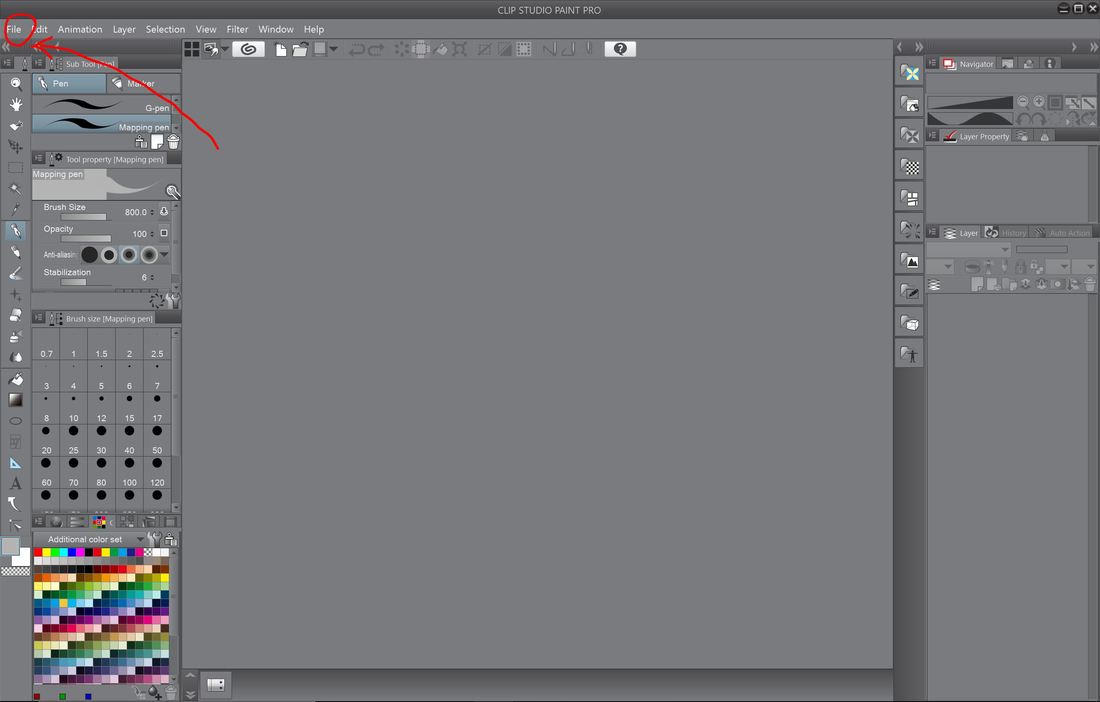 Okay, getting into the meat and potatoes of coloring a Spectickles cartoon: first, I open the Clip Studio Paint Pro Program and as you see circled in red above, I go to 'file', then in the drop-down, select 'open' and choose the cartoon I just scanned as you'll see below.  Here's the untouched scan of the cartoon I'd drawn in pen and ink. There's a great deal of white space around the edges that I'll need to trim away. 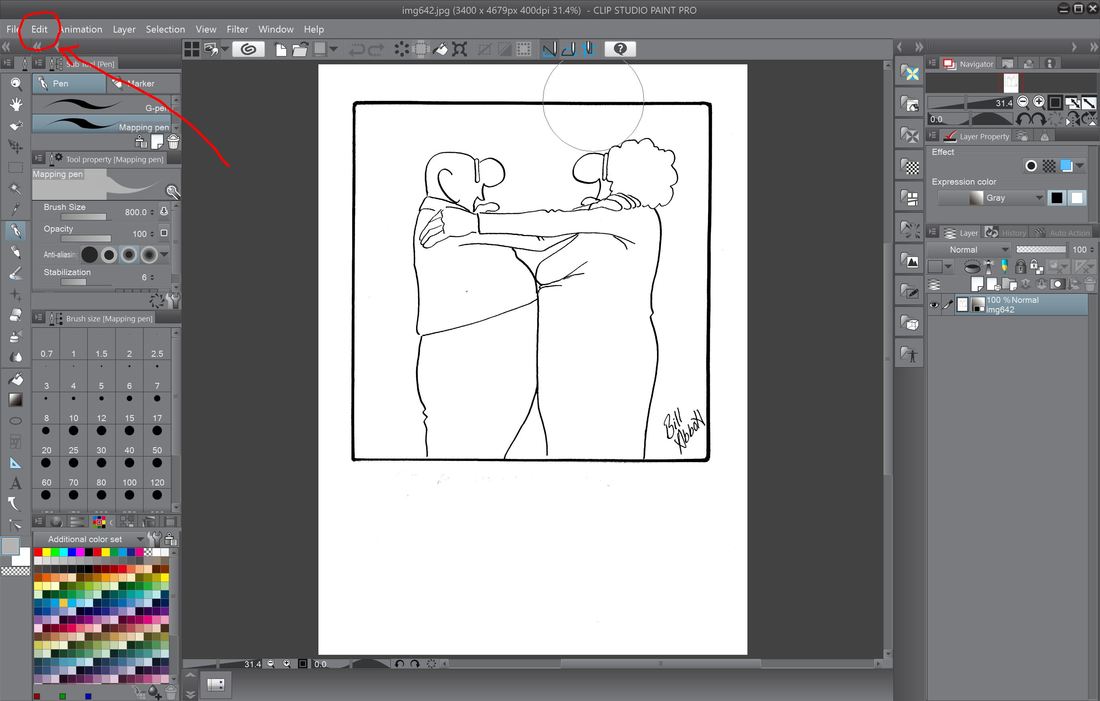 To trim away the unnecessary white space surrounding the cartoon block, you'll see in the image above where I've circled 'edit'. When you click on that, you'll see a dropdown box with a number of editing choices. For the sake of trimming away the extra material, select, 'Change Canvas Size'. 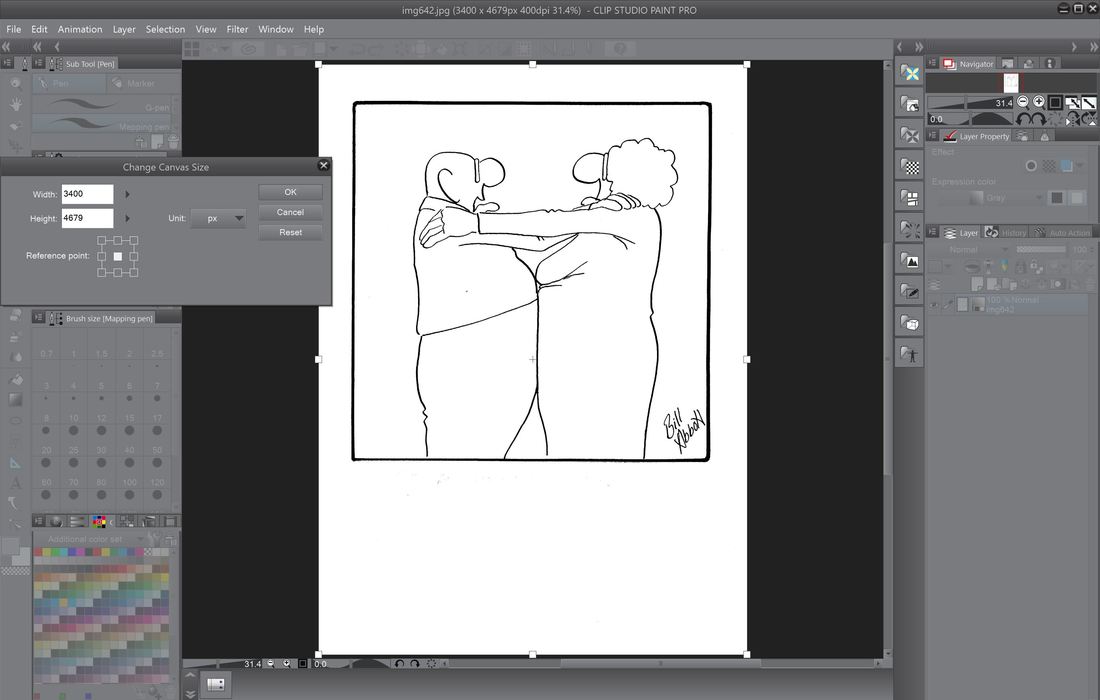 After selecting, 'Change Canvas Size', you should see something like the image above, with a small window on the left to allow you to enter a precise number of pixels for the width or height.  Rather than selecting a pixel dimension in the small window, you'll see the small tabs on the edges of the image that I've circled in red. An alternative, and the method I use, is to 'grab' those tabs and pull them in to the area I want them, thereby cutting away unnecessary white space on the edges of the image, as you'll see below. 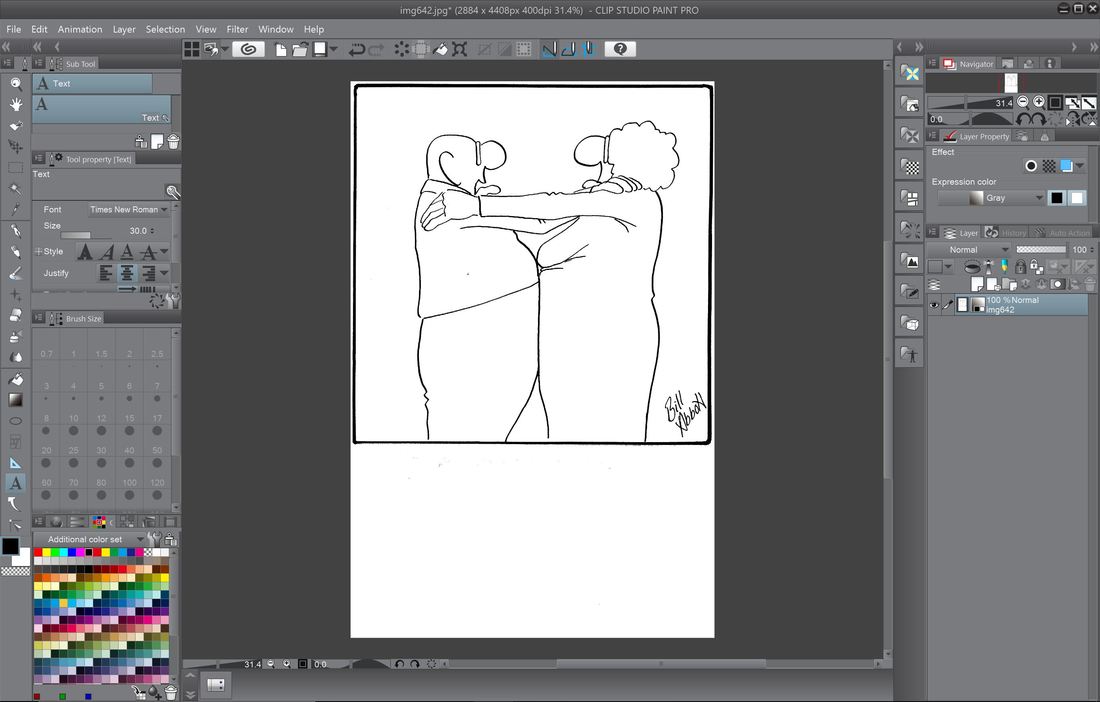 Once you're satisfied with the trimming of the image, click 'okay' in the 'Change Canvas Size' window, leaving the image ready for the next step, adding dialogue. 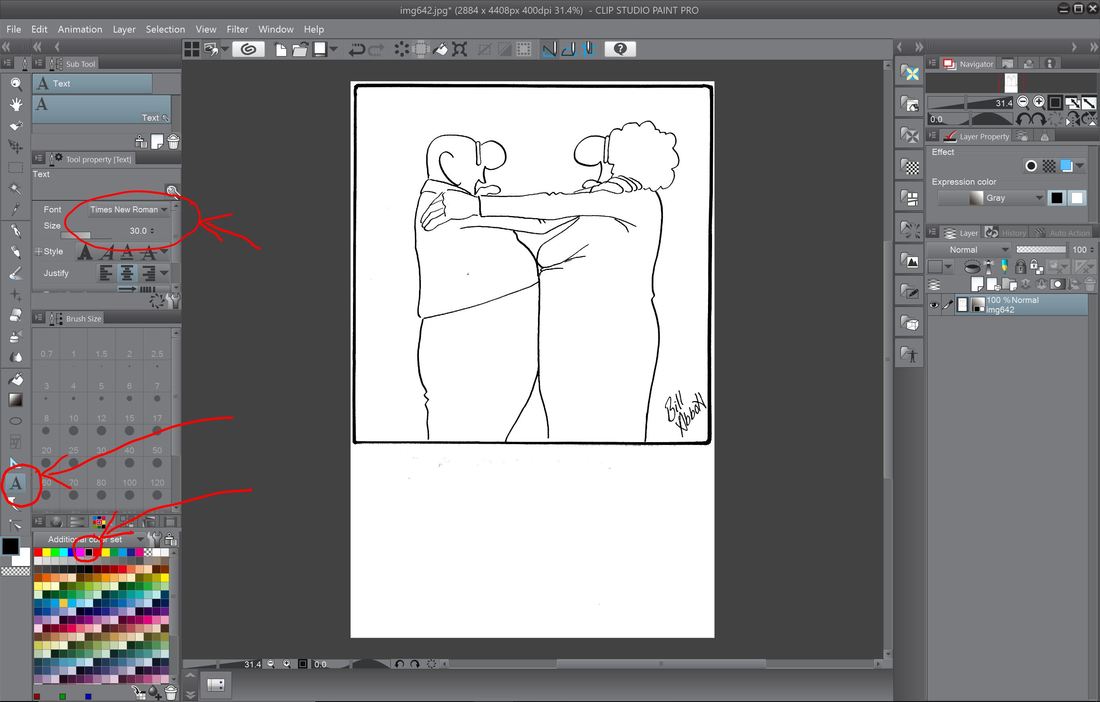 In the image above, you'll see where I circled and pointed in red 3 different areas to have a look at. First, for my Spectickles cartoons, I use Times New Roman for the gag line, and the lettering is sized at 30 pixels, as seen in the uppermost red circle. Next, in the bottom circle, I make sure the color of the text is selected; in this case, it's black. Now I'm ready to add the text, so in the middle red circle is the 'text' selection symbol. Click on that, then position your cursor at the point you wish to begin your text line. 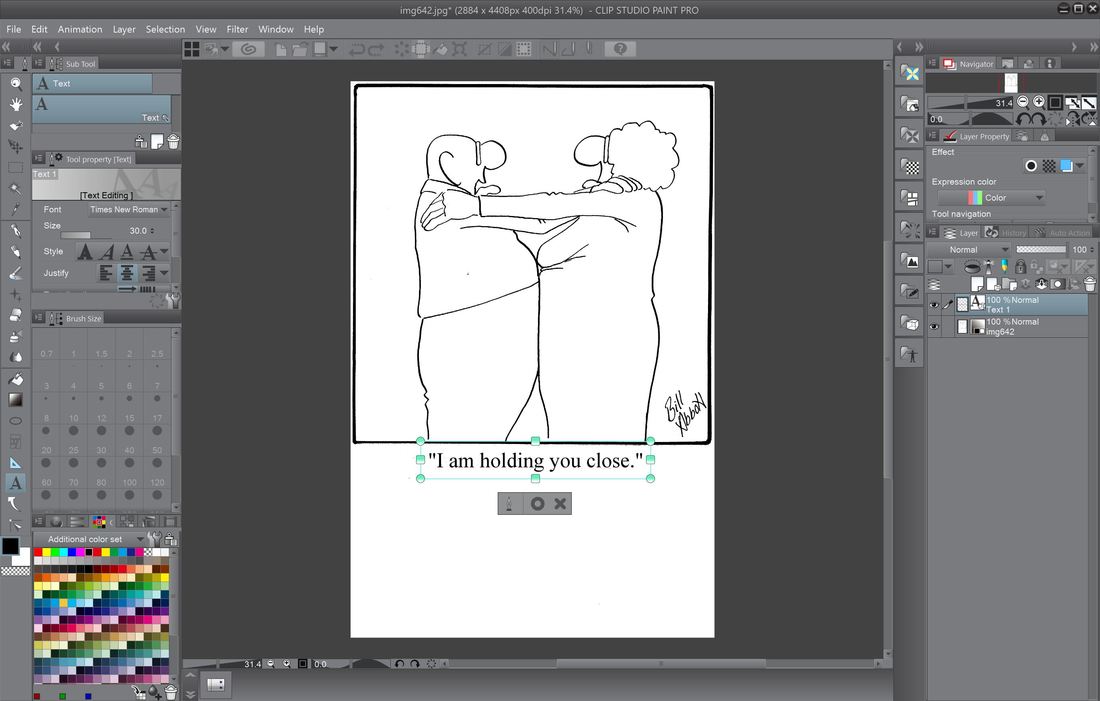 Once your text line is typed, you'll be able to resize or position using the green tabs surrounding the text box. Just click on a tab and pull it away toward the edge of the window to make it larger, or push it in on itself to reduce the size. You can also reposition the text window itself. 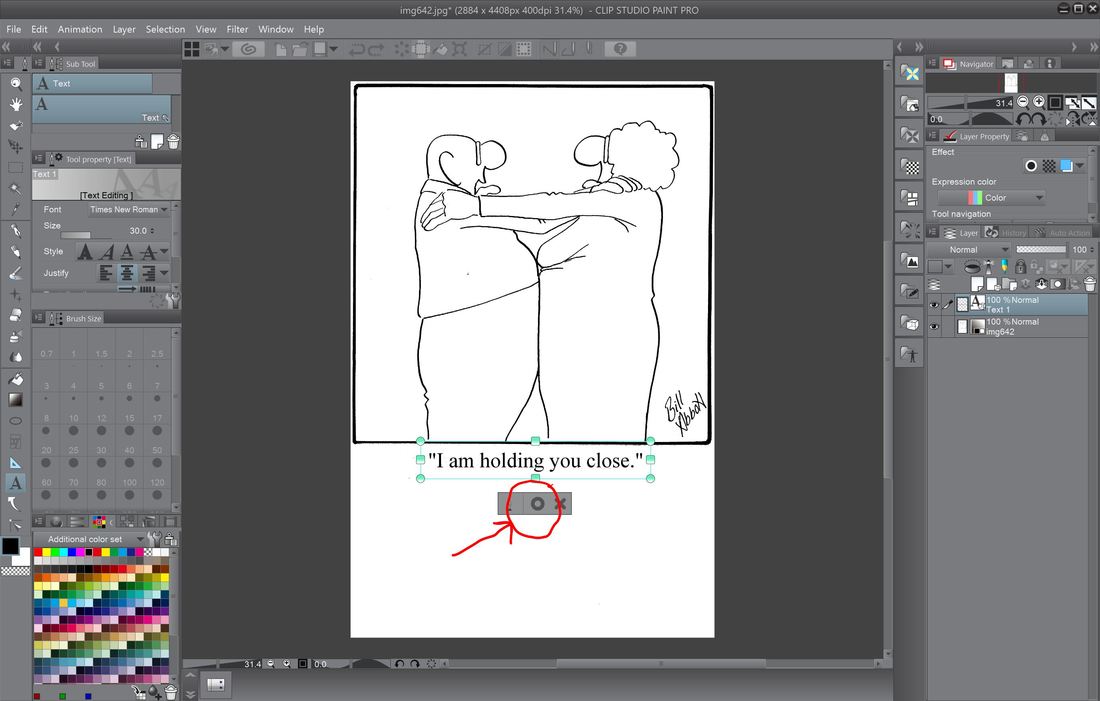 When you're happy with your gag line, click on the circle I've indicated above. Once you've done that, you'll notice the text window is still active - just click on any of the tools on the left to deactivate. I usually just click on the top-most tool, the pen tool.  Now that your gag line is complete, you'll want to trim away the extra white space below it, and just as we did before, we go to 'edit', the 'Change Canvas Size', then adjust accordingly and click 'ok' to close the window and move on to the next step. 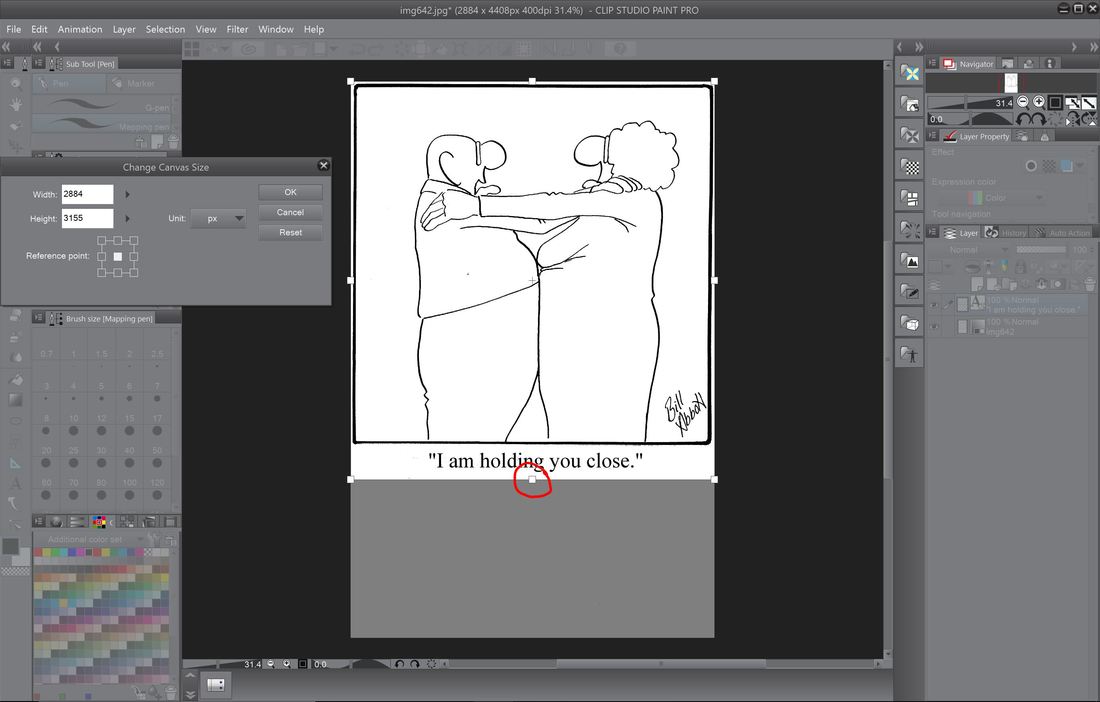 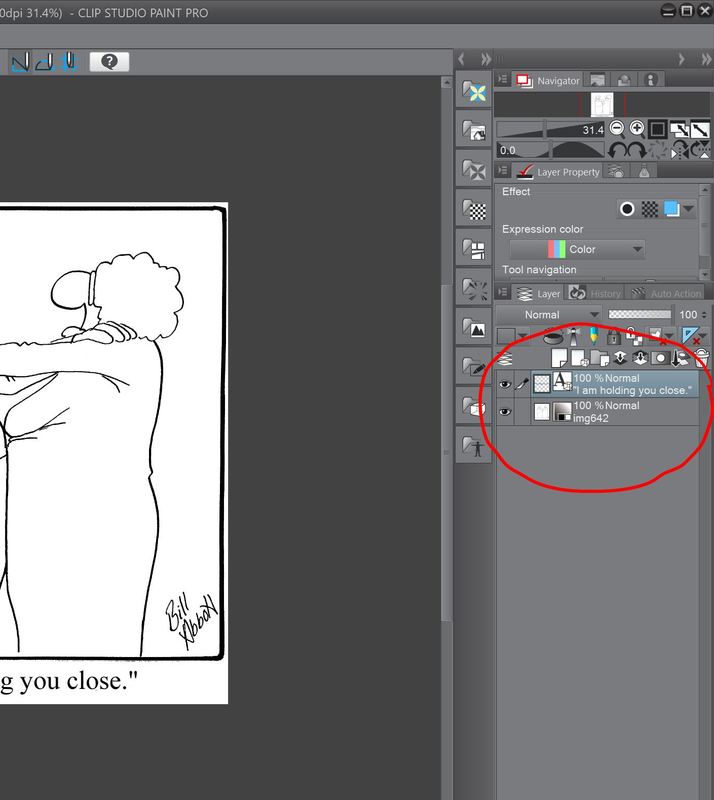 We'll cover layers in much greater detail in our next article, but for now, we need to note that the active layer, after just finishing our gag line, is the text layer. Since the next step requires us to manipulate the image, not the text, we'll need to click on the bottom layer. 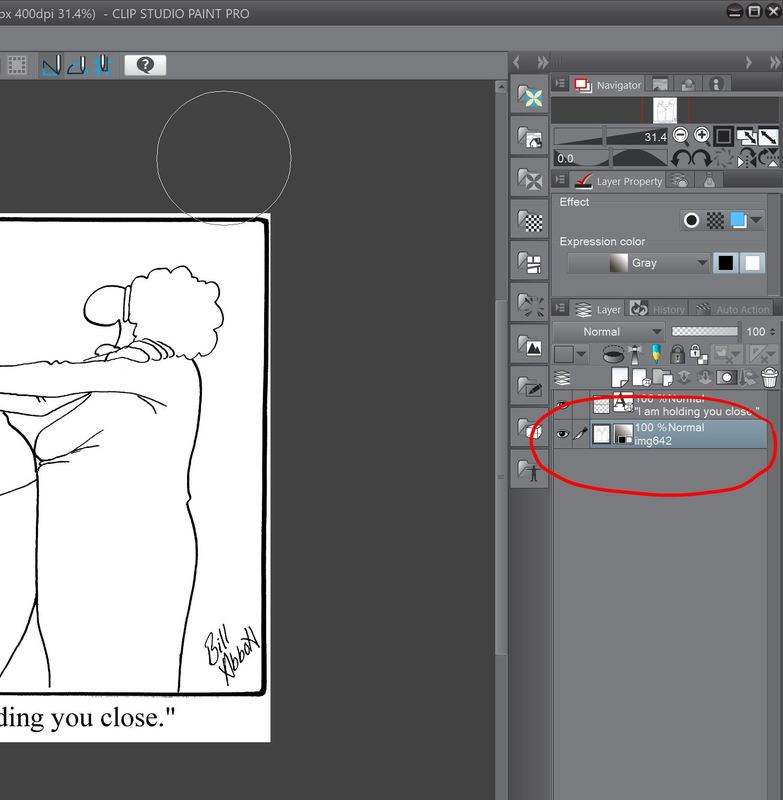 Once you've clicked on the bottom layer, it should be highlighted, as you see circled above, and therefore active, ready for us to make changes as necessary.  For newspapers, I have to provide two versions of every Spectickles cartoon; a black and white version for print newspapers, and a full color version for their webpages. For the black and white version to work as a stand-alone cartoon, it needs more bold black to stand out and to give the image greater fullness. I've circled the areas above to indicate the items that typically appear in bold black in the black and white print version of Spectickles.  Since I have to create two complete cartoons every single day, seven days a week - each one with multiple versions, I have to work as efficiently as I know how. One of the very handy tools I use to fill in areas with color (in this instance, black), is the 'paintbucket' tool, which I'll explain below. 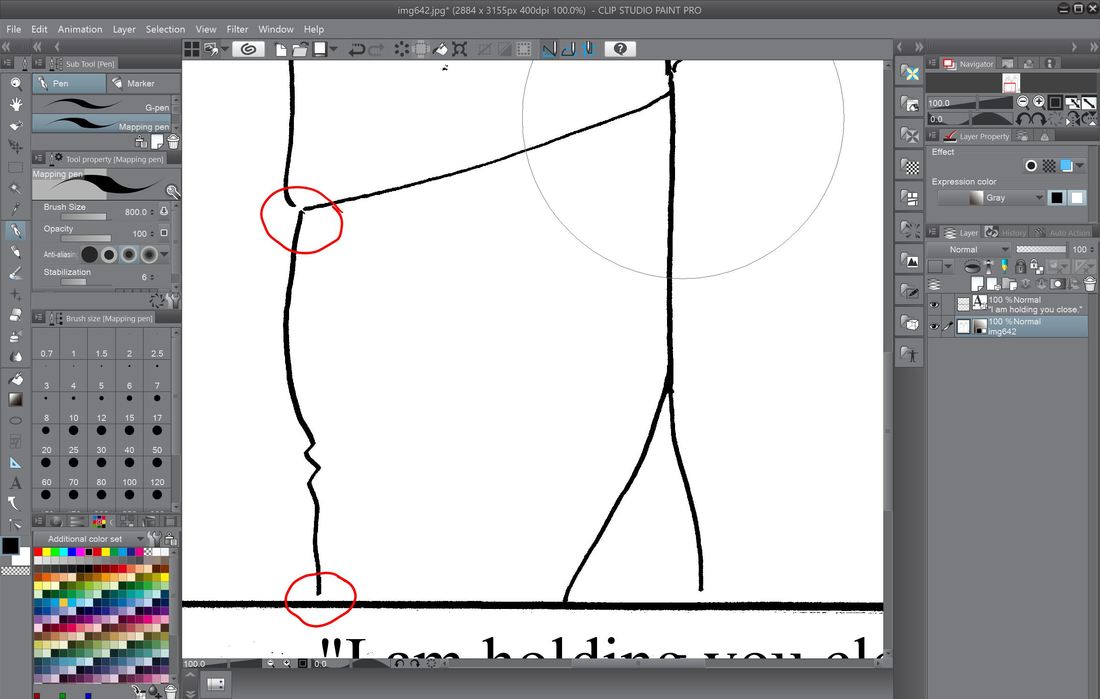 Before we use the 'paintbucket' tool, there's something we have to do first. We have to 'seal' the areas within which we intend to fill with black. As indicated by the red circles above, when I drew the hard copy version of the cartoon, I didn't extend the black lines all the way so that they connect with another black line, thereby 'sealing' that area. If you don't do this step, when you use the 'paintbucket' tool, it won't know where you want the paint to stop. Just as with real paint, if you pour it onto a surface with nothing to block its flow, it'll just keep going. 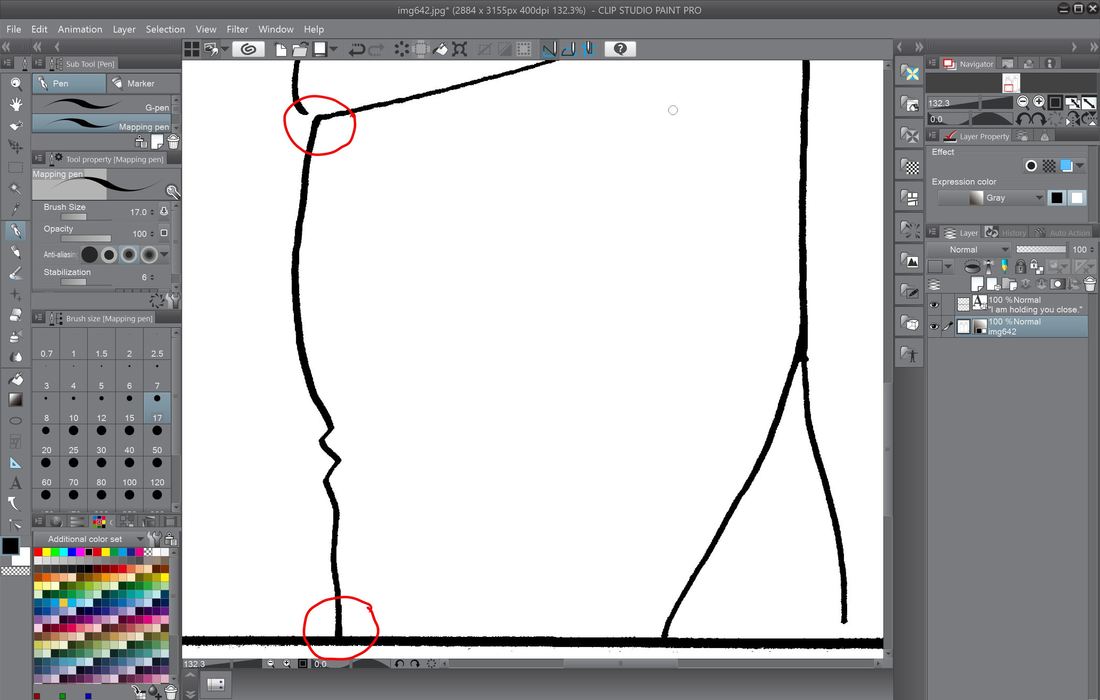 In the image above you can see (compare with the image above this one) where I used the Surface Pro pen and connected the black line, effectively 'sealing' the area I intend to fill with black using the 'paintbucket' tool. 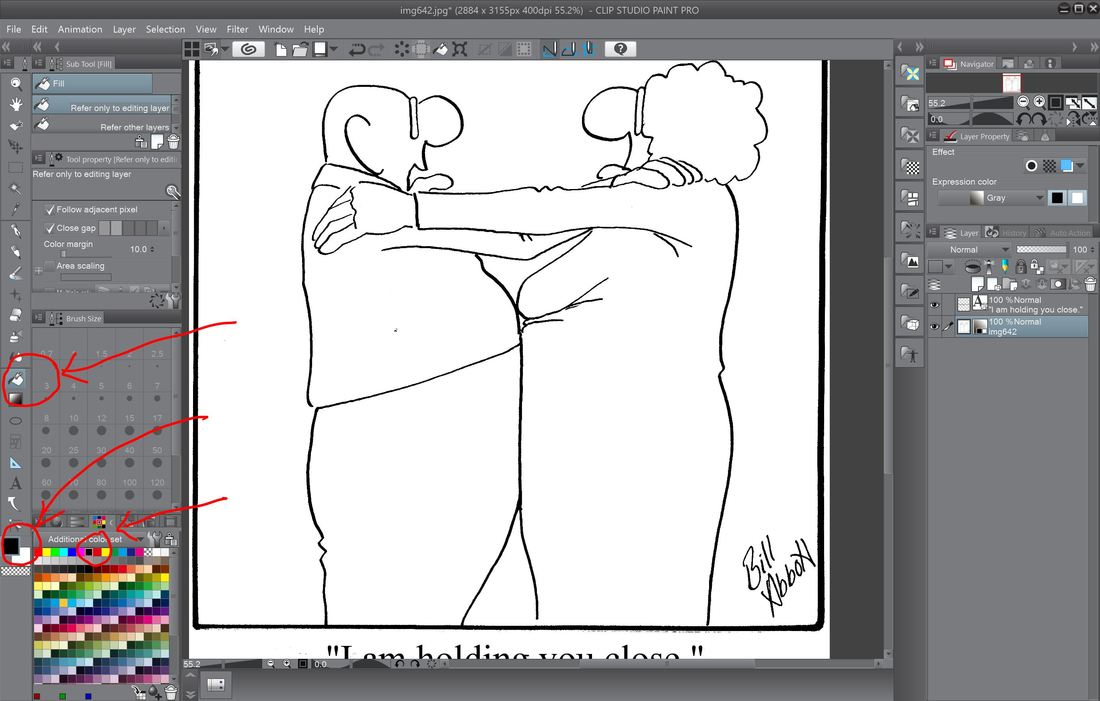 On the left are the row of tools available in Clip Studio Paint Pro. You can see in the uppermost red circle the 'paintbucket' tool which looks, ironically, like a paint bucket. Below that, make sure you've selected black as the fill color for the black and white version of the cartoon. 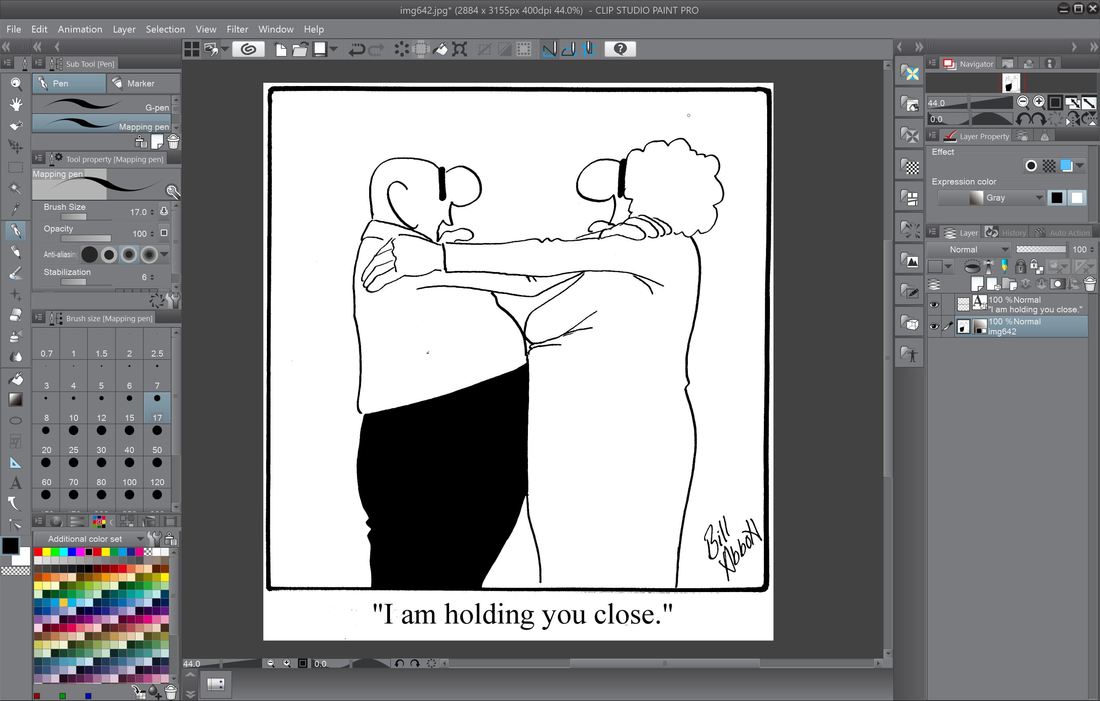 Hover the paintbucket tool over the area you wish to fill with black, left click, and there you have it - the area is filled with black. It's a super important time saver when you have a great deal of work to finish. 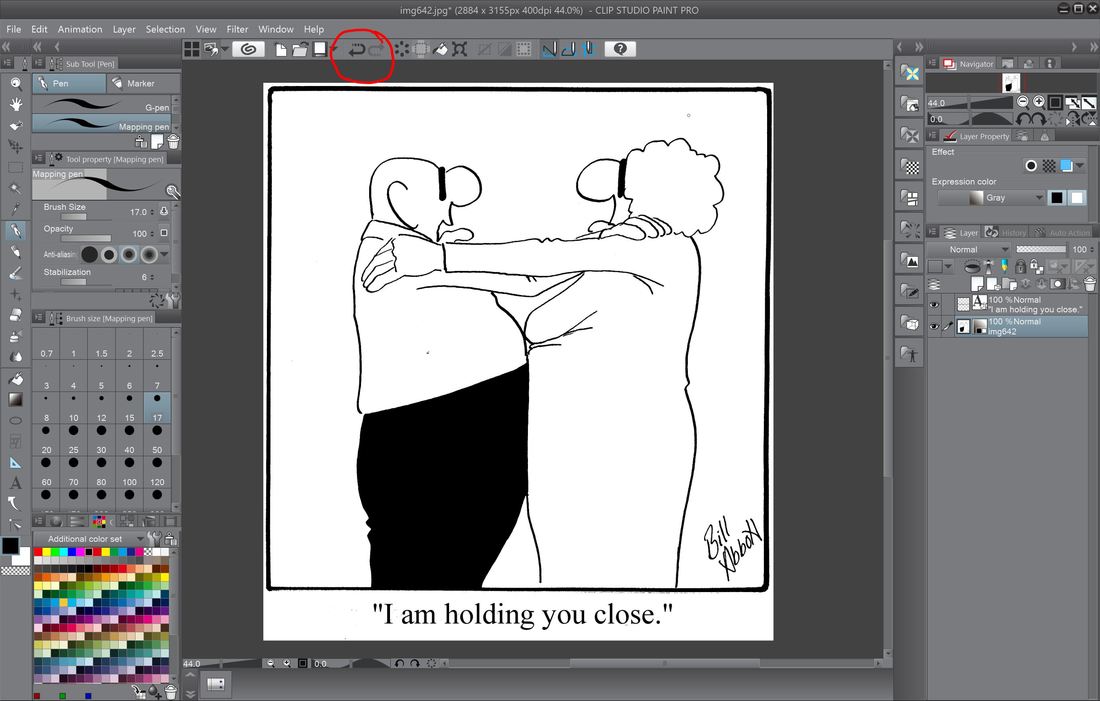 If you've made a mistake, or forgot to 'seal' an area to be filled, the red circle above indicates the 'undo' button - click on it once and it undoes whatever you'd like undone. The nice thing about the 'undo' button in Clip Studio, is that it will undo as many things as you wish - there's no limit just in case you've made a mistake well back in your process. In Photoshop, there's a limited number of things you can 'undo'.  Very, very important - don't forget to save your work - indicated in the red circle above. As I've learned the hard way many times, save frequently, so you won't have to waste lots of time doing work you'd already satisfactorily completed.  In the next installment of this series, we'll get into the meaning and use of layers, how to create them, putting down the flat colors, then shading, and saving them. Thank you for reading this!
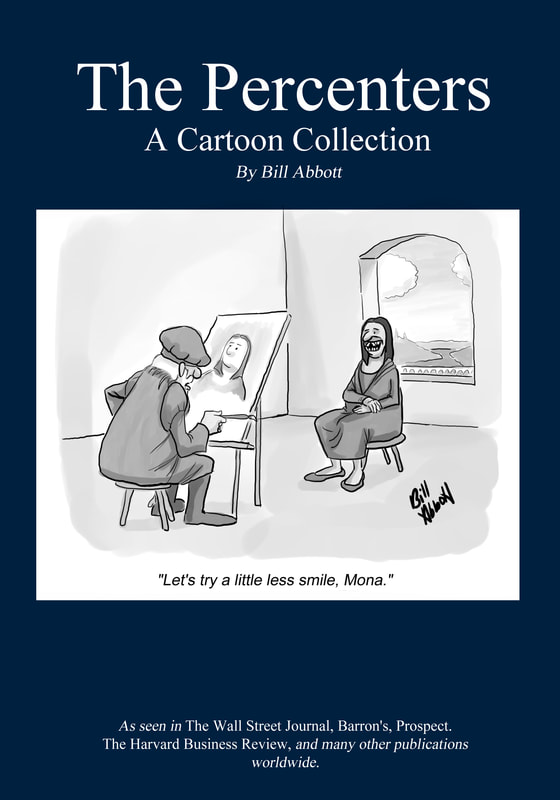 I've been wanting to put out a collection of my Percenters cartoons for a long time, and finally sat down to get it done and see it published. This collection is, in a way, my tribute to magazine cartoonists past and present, who've inspired me to want to be better as an artist and writer. The legendary cartoonists of The New Yorker, Barron's, The Wall Street Journal, Harvard Business Review, among others - this is my humble attempt to honor them. While I've never been published in The New Yorker, there is considerable satisfaction and joy in pursuing that aim; to strive to be better, and look to those who've paved the way as the map to follow.
In the book, "The Percenters: A Cartoon Collection" I've included 150 of the most popular Percenters cartoons, along with how they came to be, how they've changed over time, and the step-by-step process I follow in creating them. For those who decide to purchase the book, it's available in both digital and hard copy versions through Amazon.com. I hope you find value in it, and I look forward to your feedback. |
 RSS Feed